|
Building The 2x2x4
by Wayne Johnson
As mentioned in Geert's 2x2x6 article, I was theorising about the possibility of a working 2x2x4. My method differs greatly from that of Geert's. Where Geert creates a large 2x2x4 from a modified 4x4x4 Revenge cube, mine is constructed by modifying the cubies in a Seventowns 2x2x2 cube, and creating one custom piece (the layer 1 and layer 4 piece). These revolve around the cut groove in the body pieces. With the right equipment, it's a very simple puzzle to produce.
I cannot take full credit for this mod. I remember years ago seeing the top layer piece idea in an old patent belonging to the Subanskis???. Although this was only a suggestion in a patent and no 2x2x2 body was properly shown. Therefore it was never clear if it was possible or if the cubies would fall out. But I will take credit for the modification idea of the 2x2x2 body. I used Blender to remodel the piece virtually with exact dimensions to check if there would be sufficient clearance for a tongue to slide through the groove.
Modifying the Body Pieces
Creating the Top Layer Piece
I made the top lip using a piece of phone card, rounded on one side and this was fused to the top of the milliput block raised up by a neck of milliput, carefully filed to be rounded. This allows it to swivel in the groove of the body piece. The short of it is, milliput at that thickness is a little weak, and after a few clearance tests running the tongue through the main body piece groove, it broke. I wasn't worth bothering with fixing it, as it was a bad way to start the piece anyway.
Creating the Top Layer Piece (Take II)
Once the cubie was all superglued together and showing a basic shape, as you can see from the photo, I added lines of milliput along the seams of the adjoining mini cubies. Then I sanded each side down a day later once the milliput was dry. This provided a nice gap filler for the adjoining cubies into one solid cubie. Also, at this point, I worked the neck of the new cubie making sure that the curve of it was very exact, before putting the pieces of rounded phone card on. Actually, two pieces of phone card were used to make the tongue double thickness.
The third consideration for the mold was for the pouring. One half must be reasonably shallow to stop large bubble gaps appearing in a cast piece, when one half of the mold is closed onto the other half. A guide will be appearing shortly on mold considerations and polyurethane pouring tips.
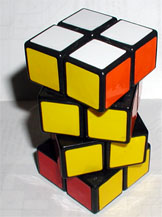
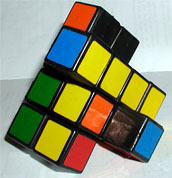
Final construction pictures below and a very simple process of assembing the whole thing. Also take note of the fine molding lines running diagnally across the top of the pieces. The mold line had to go somewhere and I compromised by having it there.
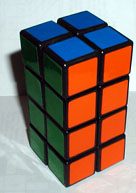
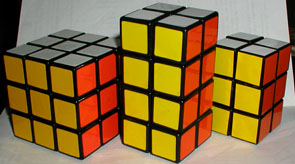
And the final result...
Improvements
There are a couple of improvements to be done. I only ever made one of these puzzles and that was given away as a gift. More will be made on a semi-regular basis. The first improvement is in the thickness of the neck. It does need to be thicker when the puzzle contorts into different shapes meaning stress can be placed on top layer pieces. A new mold will be made as soon I get that job sorted. The second improvement is in the grinding or filing of the main body pieces. This should be done with a Dremel-type tool if possible as the shaped tools allow greater accuracy and you will get a faster overall production of pieces. Helps with the patience levels as well. If you are interested in getting a 2x2x4 built in exchange for a trade, let me know. |
|
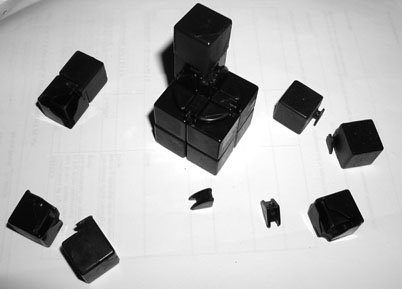
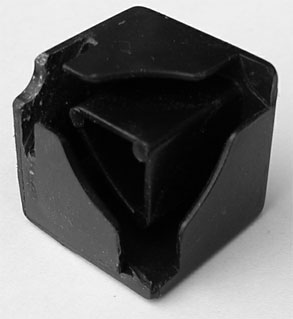 As you can probably imagine, I was very pleased to see that on one side of the cubie, there was sufficient clearance for a tongue. So I cut the groove using a flat needle point file and cut the hole in the corner with a round file. This sort of job is best done with a Dremel tool, but I didn't have one at the time so each piece was done with by filing. This procedure needs to be done with all eight cubies on the 2x2x2. It's a quick job, probably only taking a bit over an hour, but it is best to take a little longer for safety.
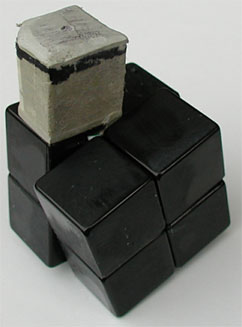
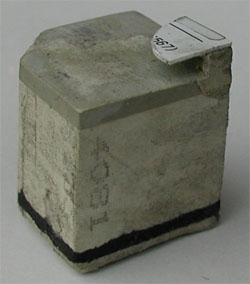 It's a bit comical looking but at the time, I was trying to work out how to make a blank cubie the size of a 2x2x2 cubie. The hollow of a medium/large tiled cube was about the same size so I lined the hollow with some paper and filled the hollow with milliput. Of course, the hollow of a cube has a truncation along one edge which I intended to fill later. The paper was to stop the milliput from sticking permamently inside the hollow.
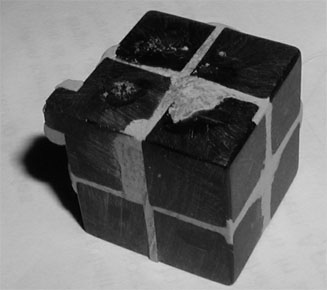
 I started the piece again using a different tact. 8 cubies from a mini 3x3x3 equate roughly to the dimensions of one standard 2x2x2 cubie. Therefore, I shaved to tongues off 7 mini corner cubies, and left the rremaining one unaltered. Then I glued all 8 together. The one with the tongue intact was glued in backwards. The tongue of this little cubie provided the base to build the small neck.
 I made sure all the sides were properly smooth and rounded all the edges using fine sandpaper. Next it was time to make the mold. This was my most complex two-part mold to date. The reason for this is because it wasn't as simple as just choosing a diving line and building the two halves of the mold. I had to consider that the mold must be easily dividable after a piece has cured inside, and more importantly, the piece must be easily removed. If pressure must be put on the mold, even seeming low pressure, the mold will eventually tear open.
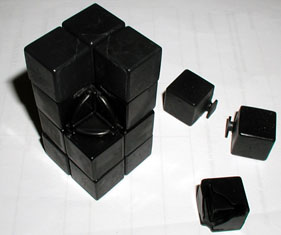
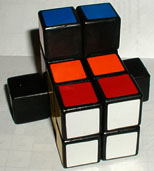
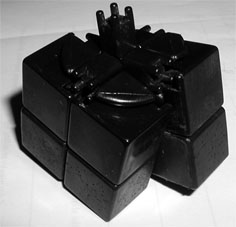 An exciting moment arrived four pieces were cast and placed on the bottom layer of the 2x2x2 cube. It worked perfectly. You can see from this point, another version of a 2x2x3 could be built by plonking the old 2x2x2 body pieces in place. For another day perhaps...